This is the second in a series of articles about creating a simulated environment for testing systems that cross subnets.
- Part 1: Networking
- Part 2: Domain Controller
In Part I of this series, I showed you how to setup the networking and router for our simulated network. In this article, we’ll create the domain controller.
An Active Directory (AD) domain controller is the core of any enterprise Windows network. Most of us are familiar with Active Directory for its authentication capabilities – we login through Active Directory anytime we access our company networks, for example, and SQL Server’s Windows authentication ties into Active Directory if you use a domain account. However, it’s much more than just authentication. Active Directory provides services to every part of the Microsoft ecosystem, including centralized user administration, authentication and authorization for both users and devices, group policy administration, and DNS services, just to name a few. The domain controller is the server that houses your network’s Active Directory components, and it’s such a critical piece of the infrastructure that a network almost always has more than one.
For this exercise, we’re going to keep our network simple since it’s an isolated test environment. We’ll only have a single domain controller, and Active Directory will be minimally configured (just enough to allow our Windows services to operate properly).
Before we configure AD, though, we need to create a Windows server in our virtual environment. Start by downloading an evaluation copy of Windows Server 2012 R2 from Microsoft TechNet here. I selected the VHD (Microsoft’s Virtual Hard Disk format) file – the format can be imported by both VMware and VirtualBox, and it saves the time of installing Windows – but you could use the ISO (disk image) file if you prefer.
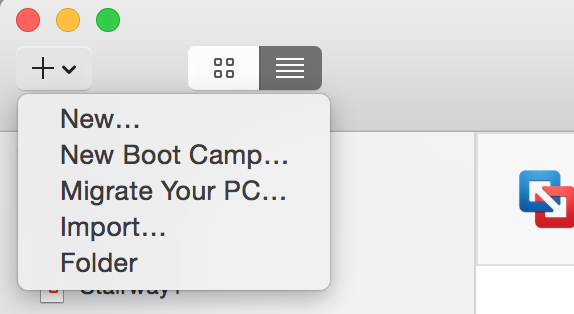
After the download completes, create a new virtual machine that imports the VHD file to create its disk. In VMware Fusion, you can do this by selecting File > Import, or by clicking the Add dropdown on the Virtual Machine Library’s toolbar and selecting Import.
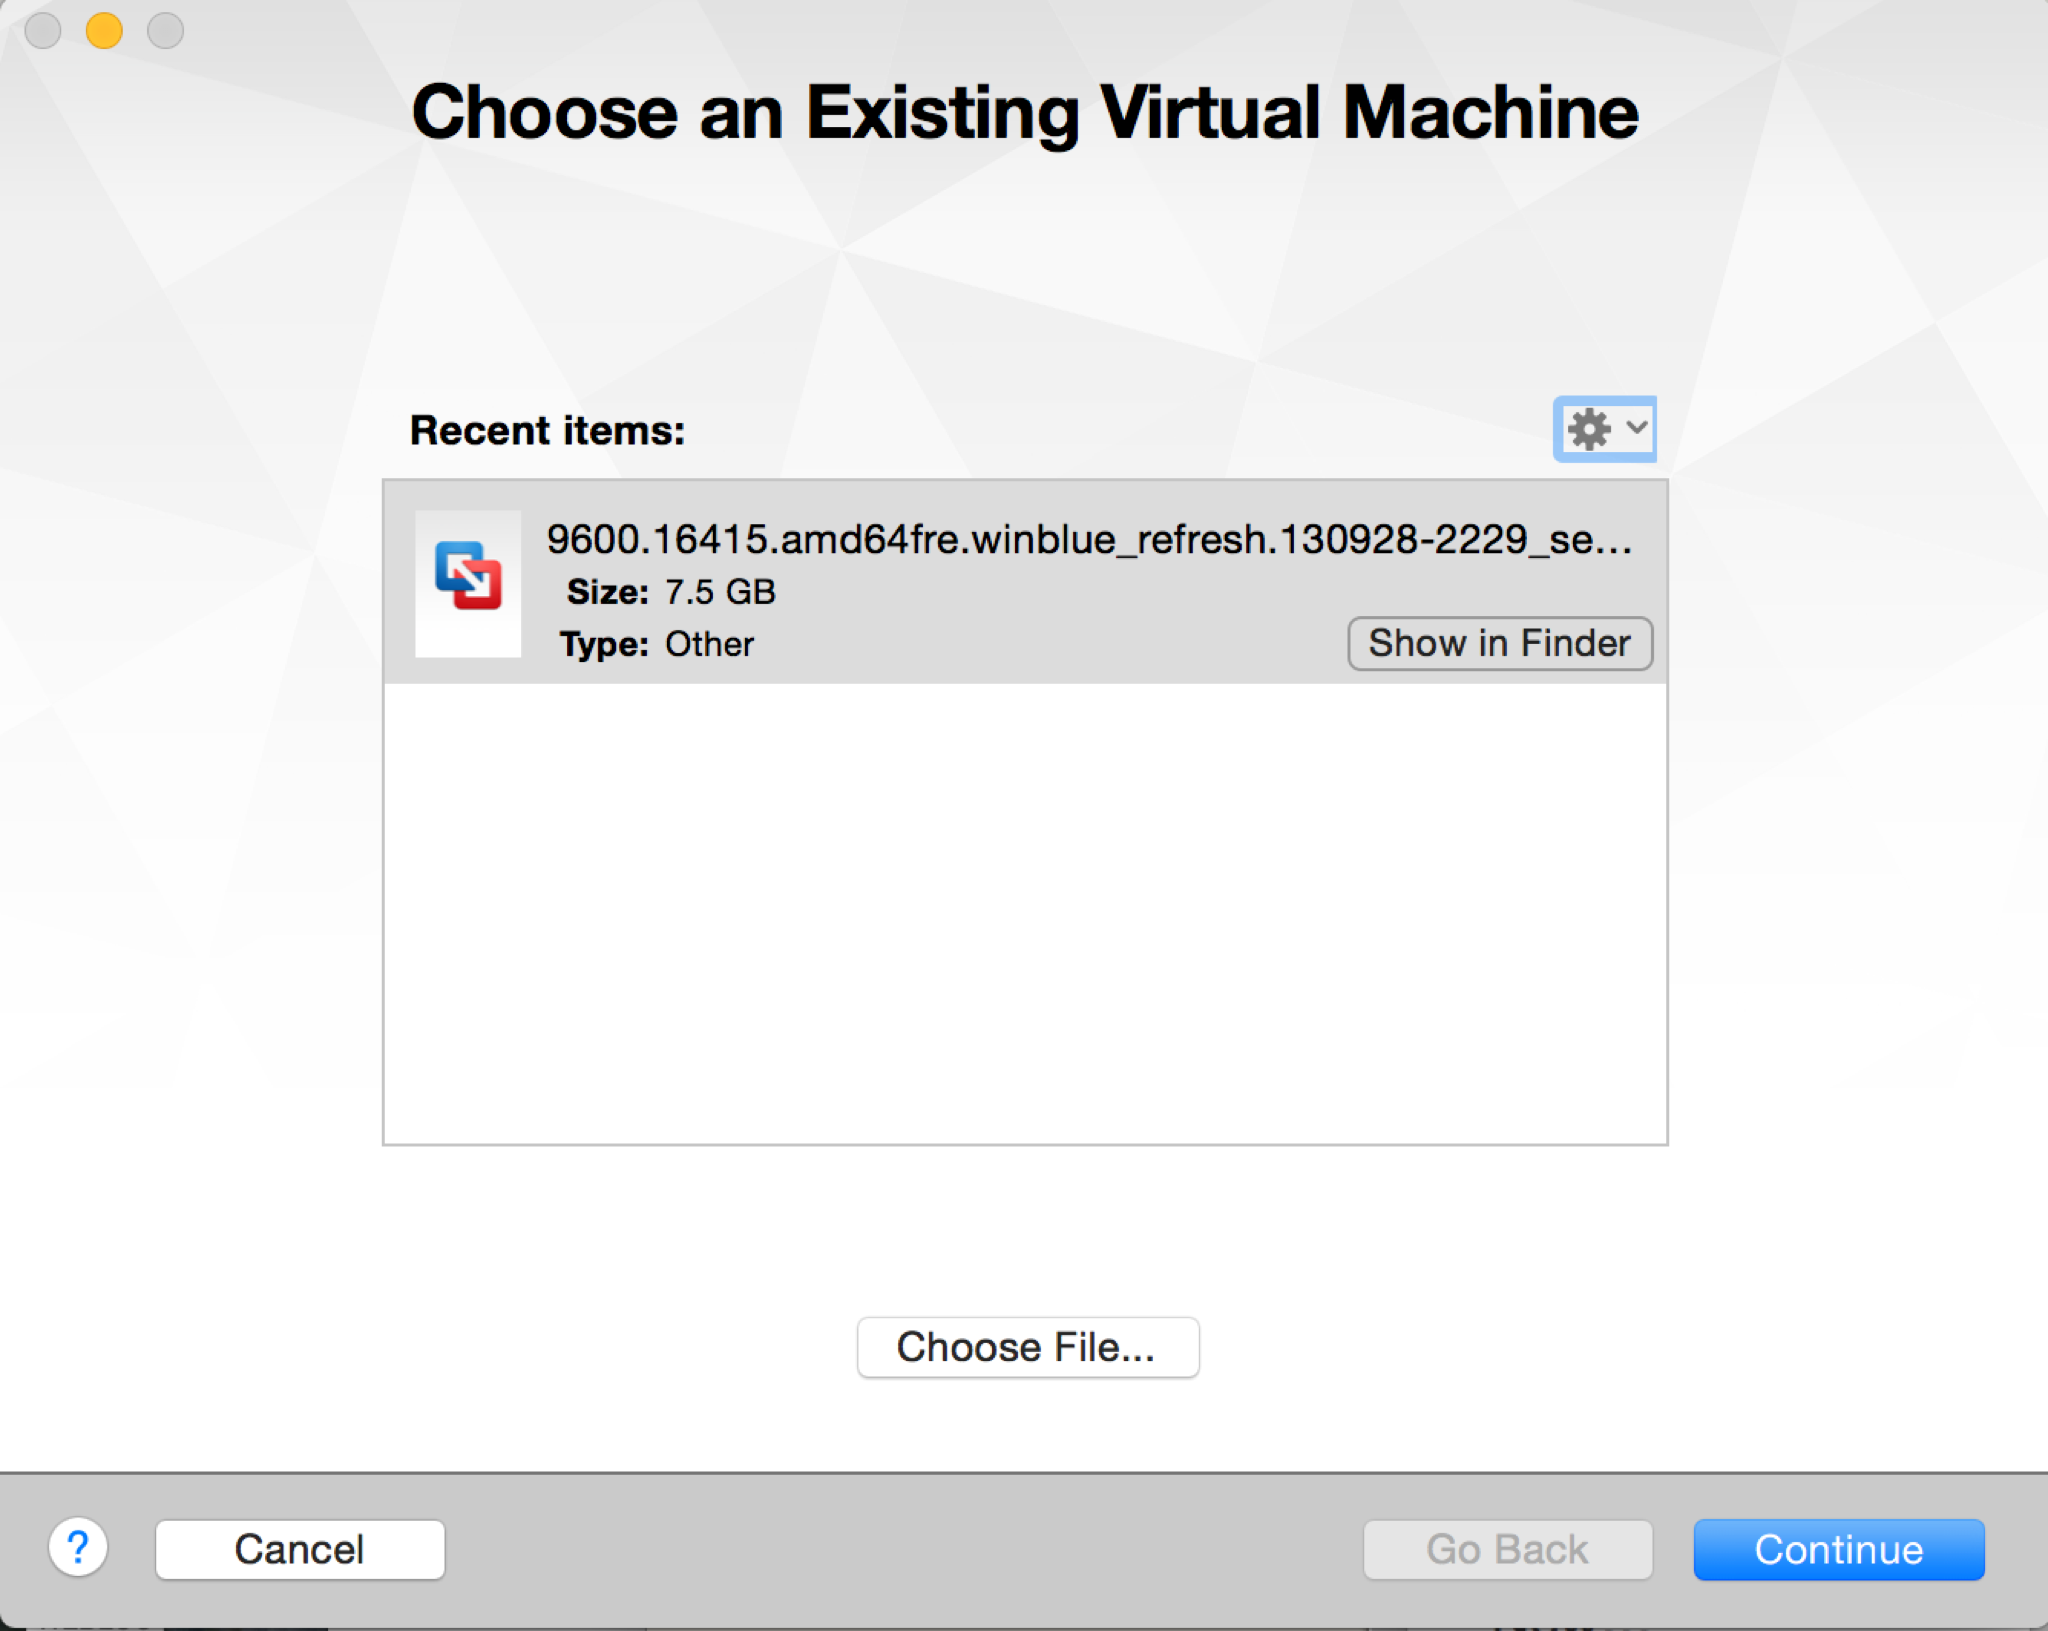
Either method will prompt you to choose an existing virtual machine. This is referring to the VHD or VMDK (VMware Virtual Disk) file, not the VM itself, so click Choose File… at the bottom of the window, and select the file you just downloaded.
Click Continue, and VMware Fusion prompts you to save the new virtual machine. Fusion will make a copy of the file you’re imported and convert it, if necessary, to its native VMDK format.
We need to adjust a few of the settings before starting the VM, so click Customize Settings (or open the Settings pane for the VM, if you’ve already clicked Finish).
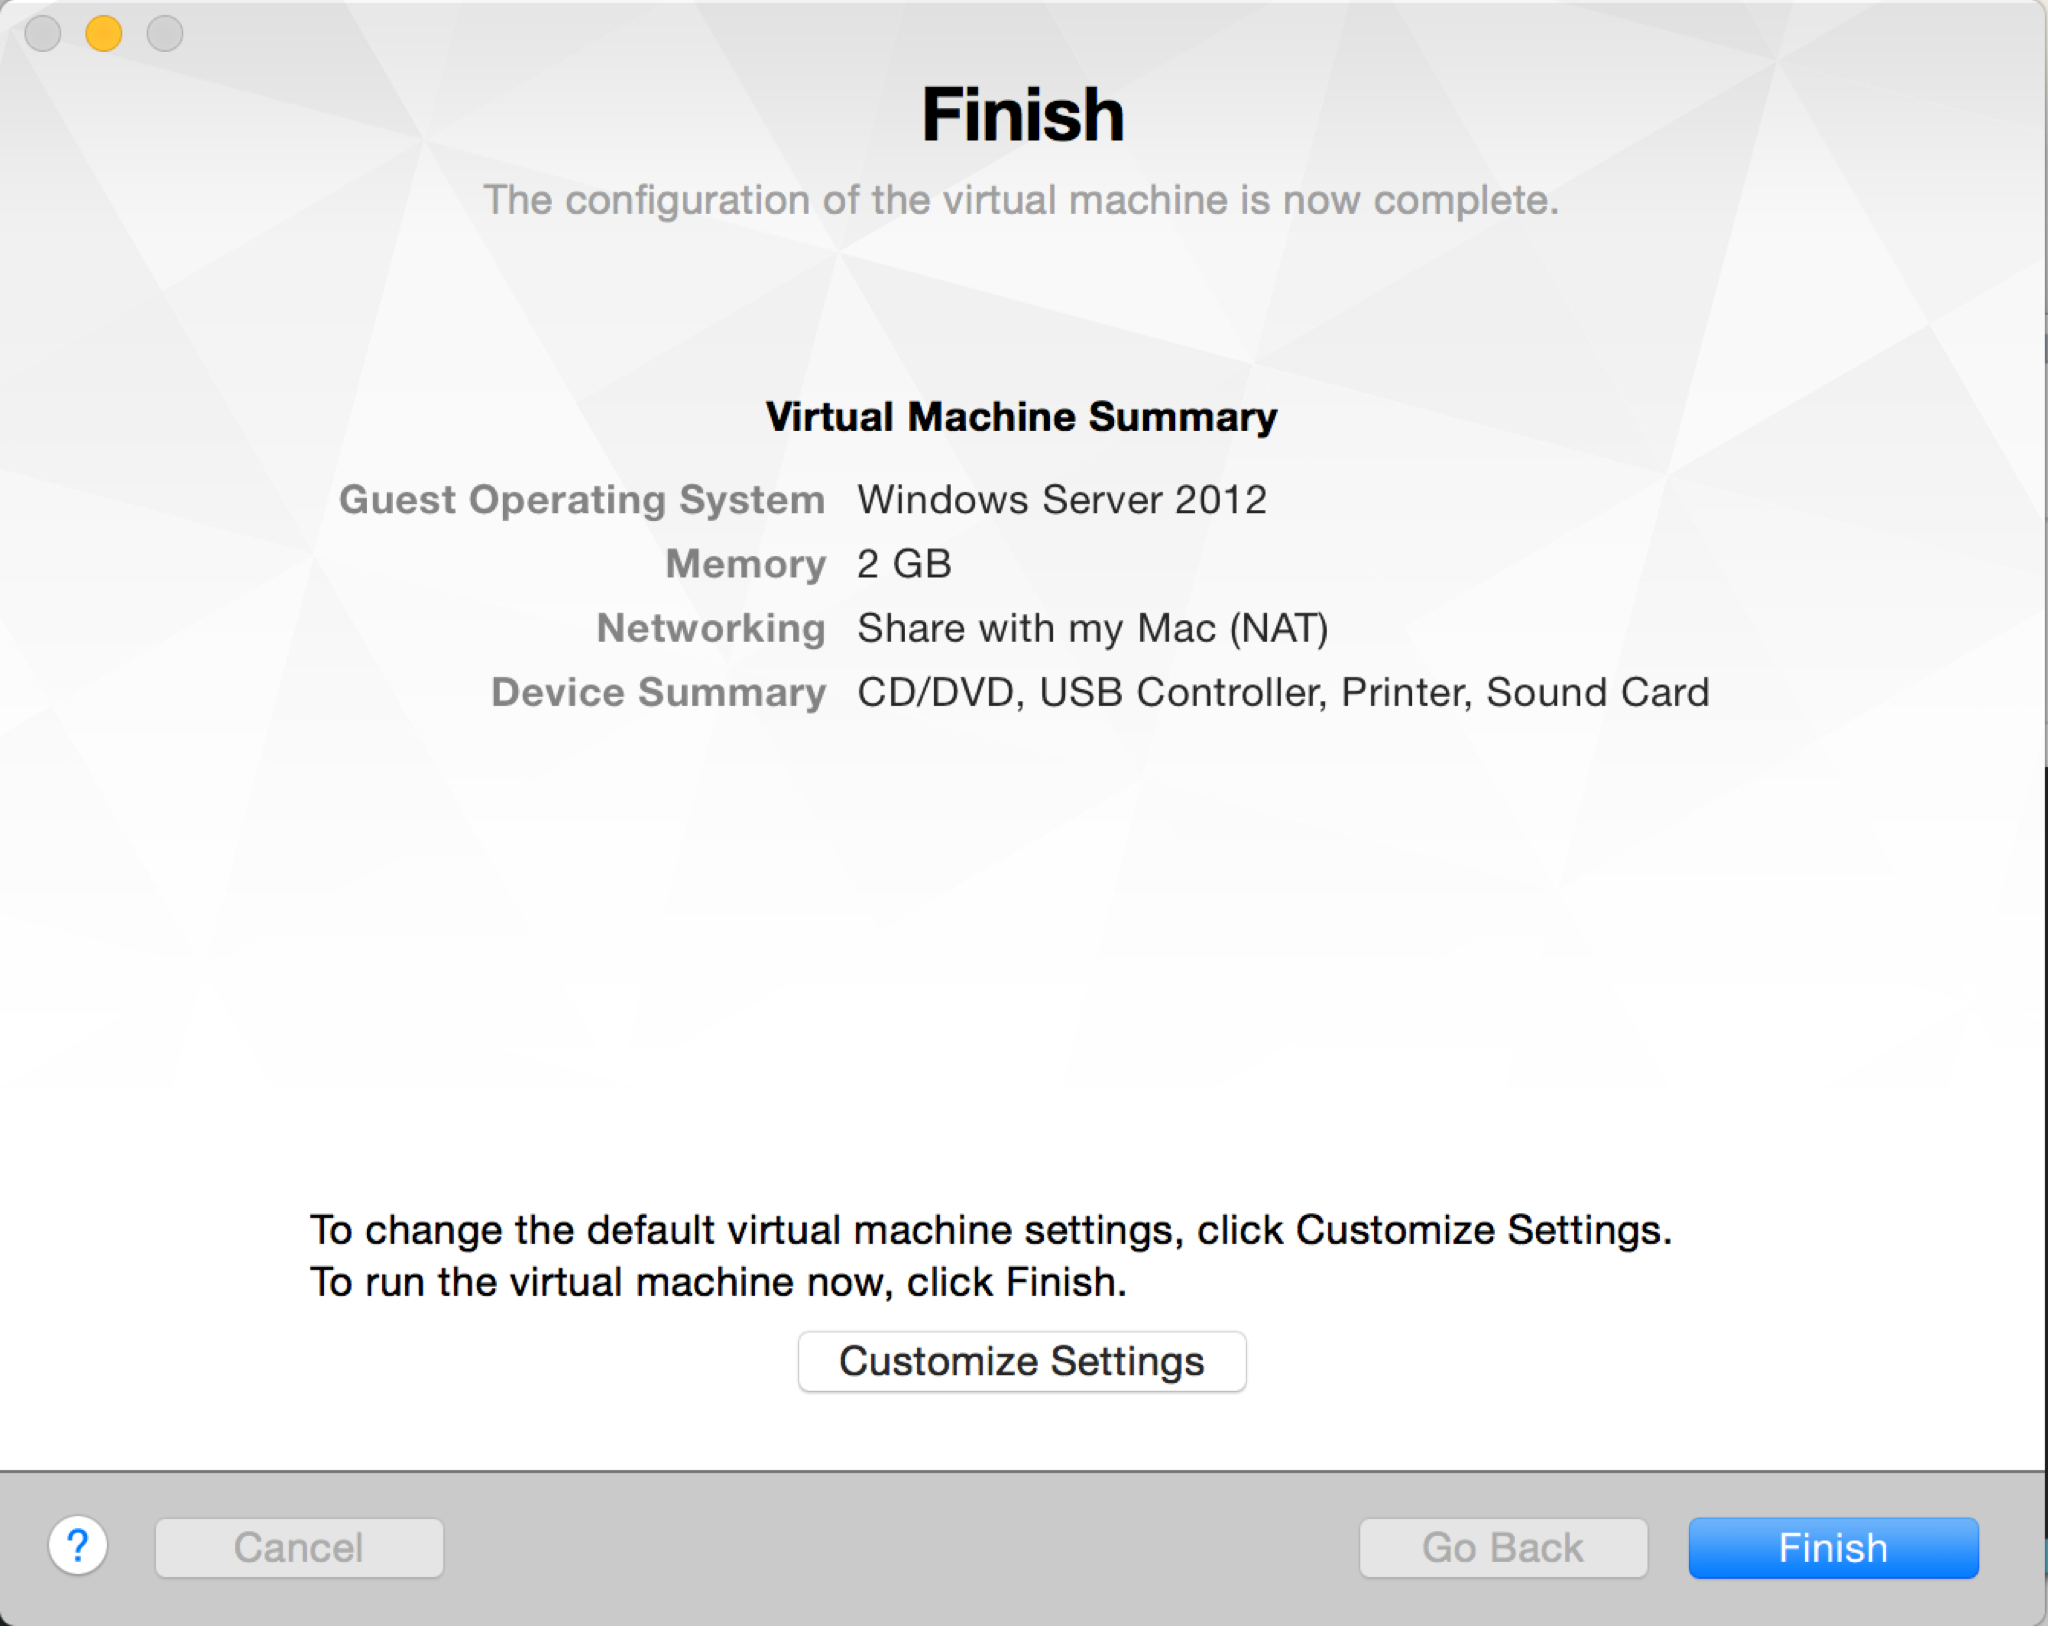
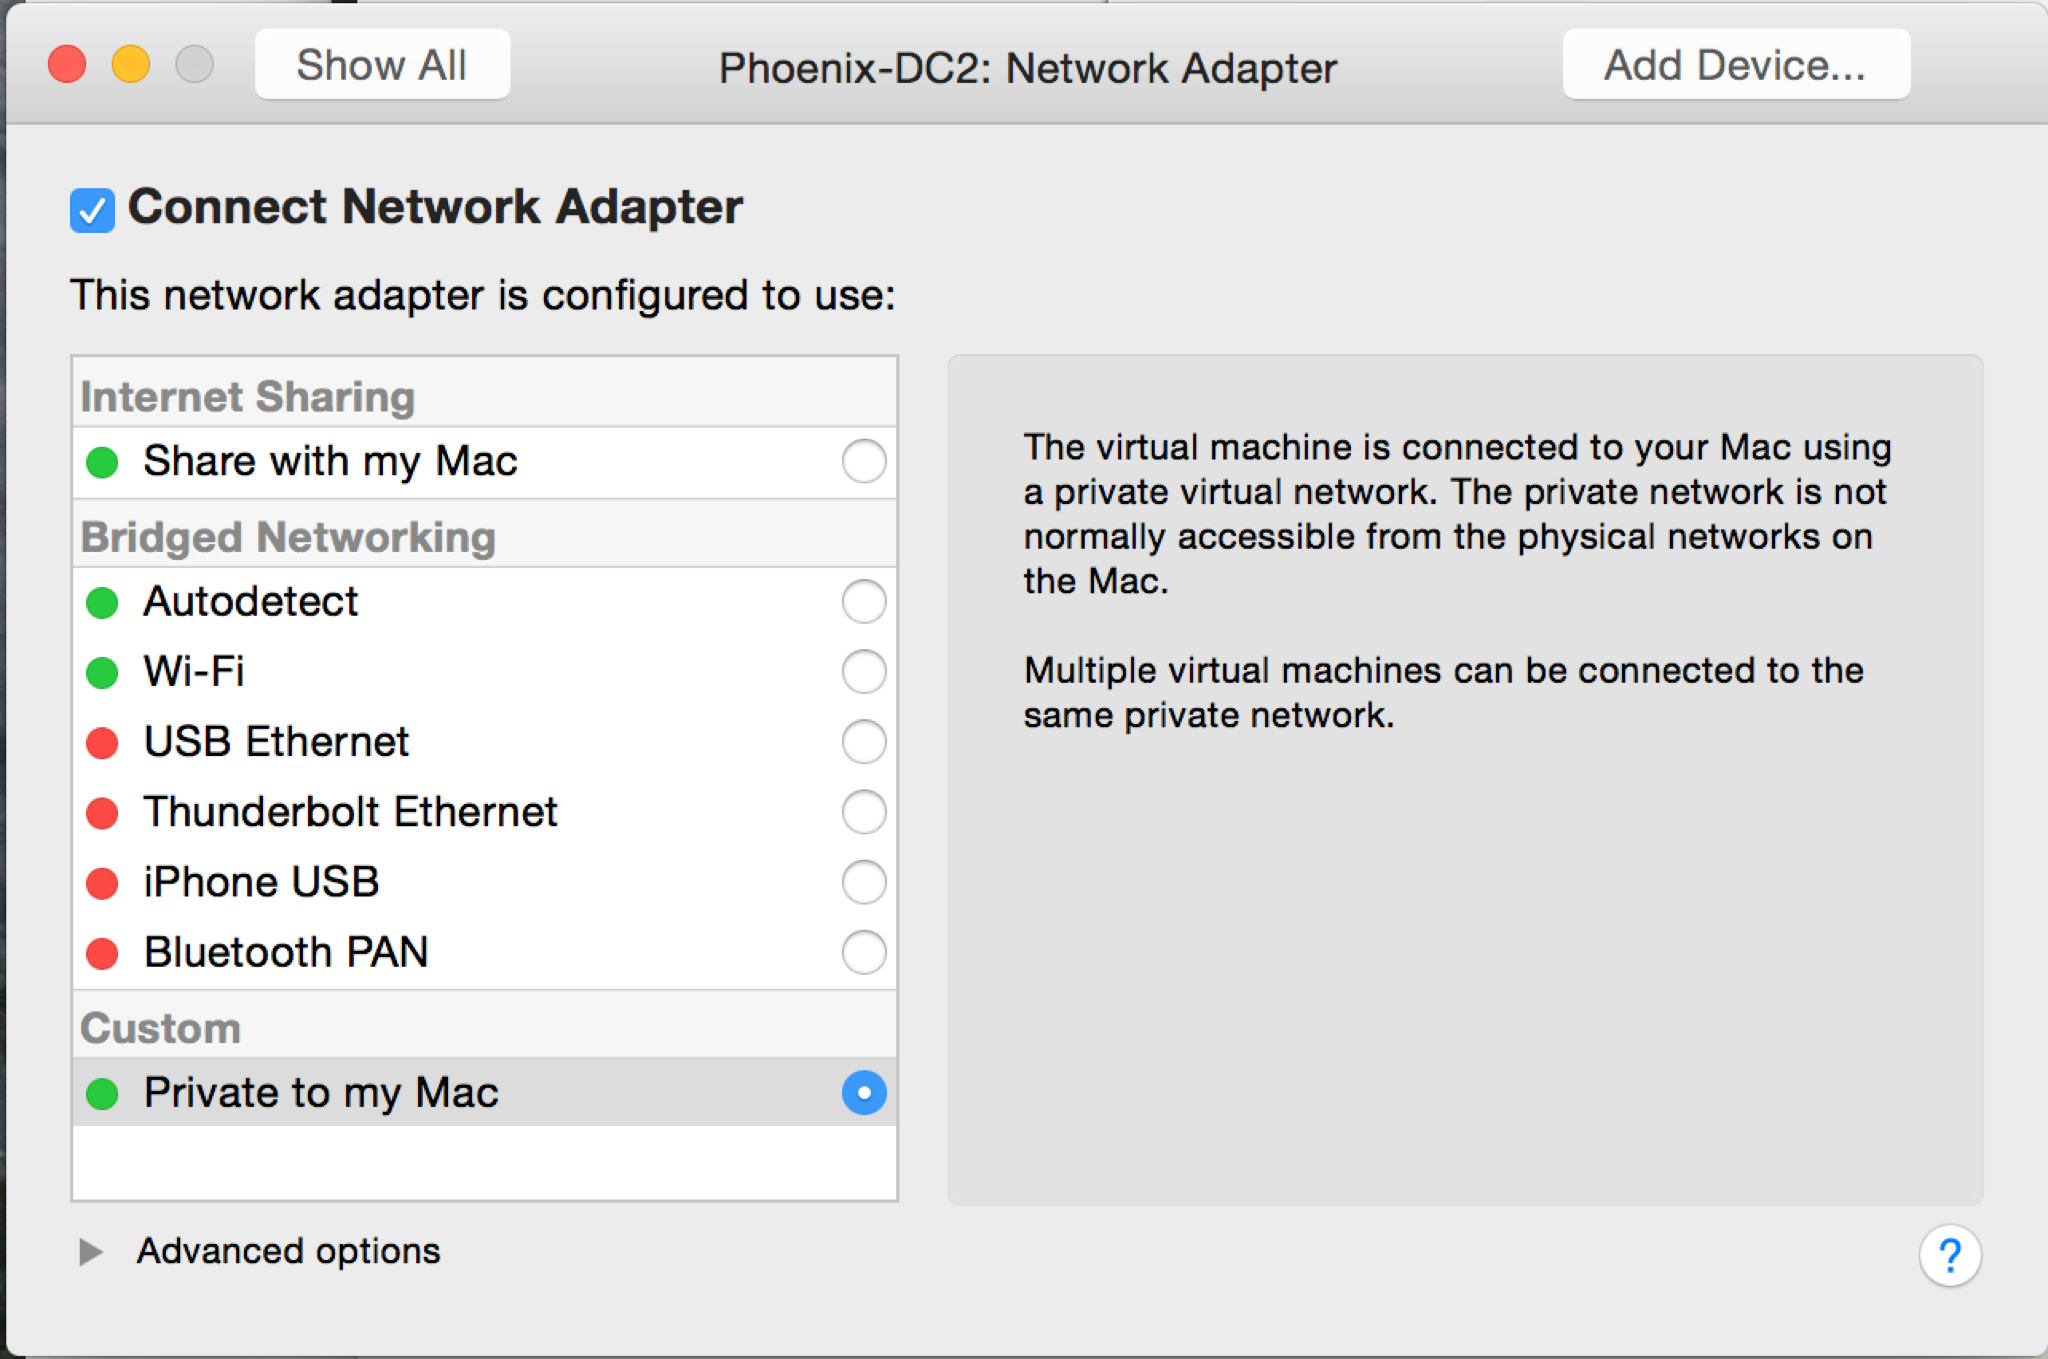
The primary change you’ll need to make is to the network adapter. Open its settings pane, then change the type to Private to my Mac – we want all traffic for this VM to go through our router.
I’d also recommend verifying the processor and memory settings. VMware Fusion defaults these to 1 CPU and 2GB RAM for Windows Server 2012, but you may want to modify them to suit your system.
Once you’re satisfied with the settings, go ahead and start the VM. At this point, it’s a standard Windows Server 2012 R2 system, just as if you had installed it from the ISO or a CD. Answer the language prompts, accept the license terms, and set the Administrator password, then login.
Once you’re at the Windows desktop, we need to configure the network adapter to place it on our router’s network. Open the Windows Control Panel, then browse to Network and Internet > Network and Sharing Center. Click Change adapter settings in the left pane of the resulting window. You’ll be brought to a screen that looks something like this:
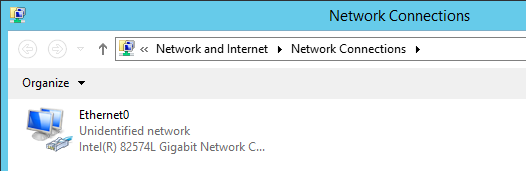
Right-click the displayed network adapter and select Properties. The following window will be displayed:
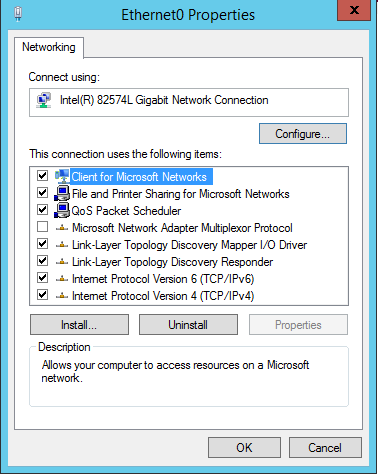
Click on the last option, Internet Protocol Version 4 (TCP/IPv4), then click Properties. Manually set the IP address, subnet mask, and default gateway (router) IP address as shown, using the addresses you selected in Part I:
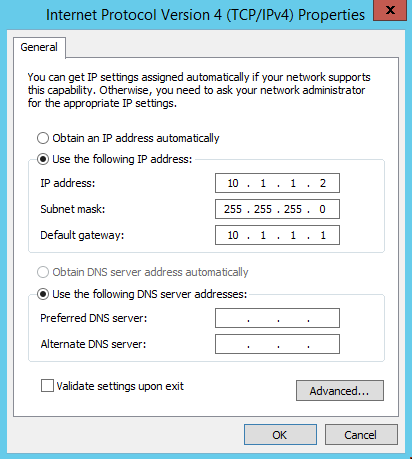
Leave the DNS server addresses blank for now. (They’ll be set automatically in a later step.)
At this point, I also like to change the name of the server – VMware’s naming is random – and take care of basic configuration tasks like setting the time zone.
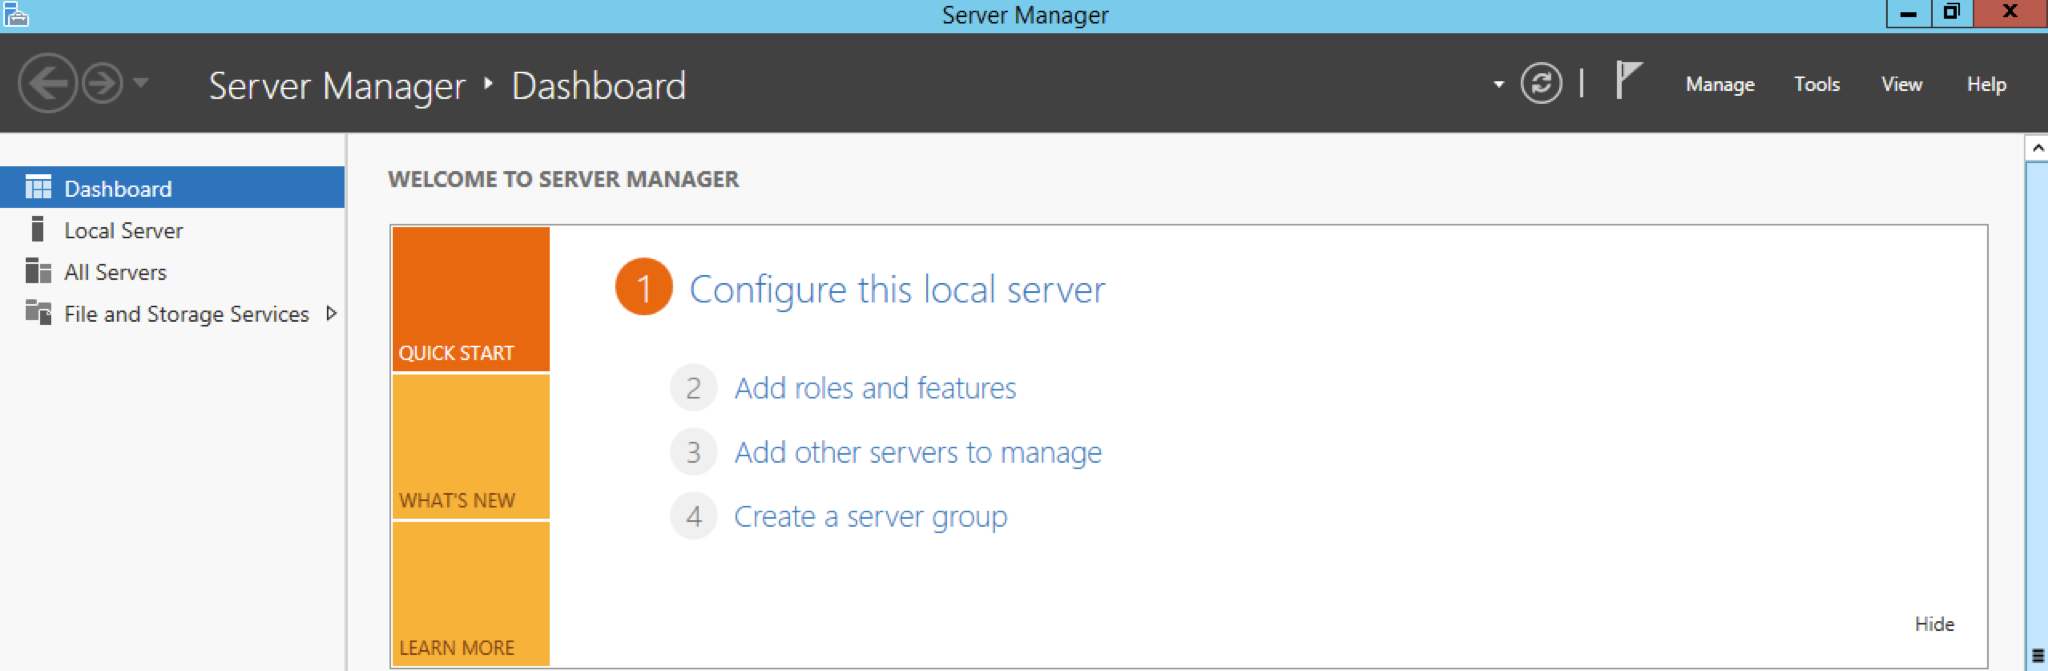
Now we’re ready to make this a domain controller! Modern versions of Windows make this easy: it’s just a role that can be added at any time. Open Server Manager (if it’s not already open) and click Add roles and features. (If you’re not at Server Manager’s Dashboard, the command can also be found under the Manage menu on the top right of the screen.)
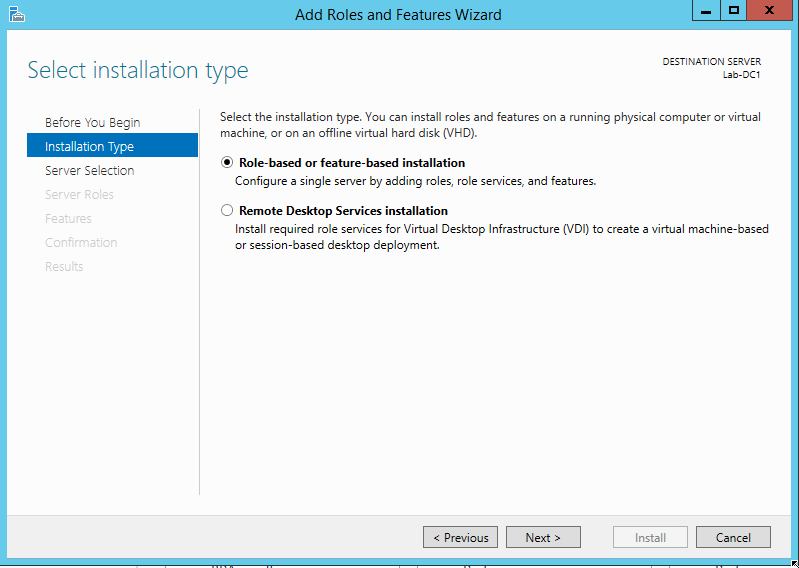
This starts another wizard. Click Next to move past the introduction page, then select Role-based or feature-based installation and click Next.
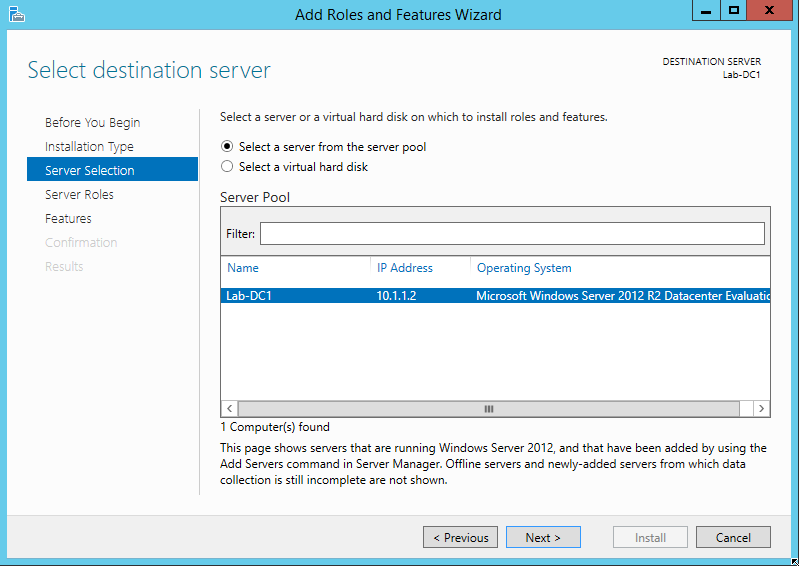
Select your machine’s name in the list provided on the next screen (it will probably be the only one listed) and click Next.
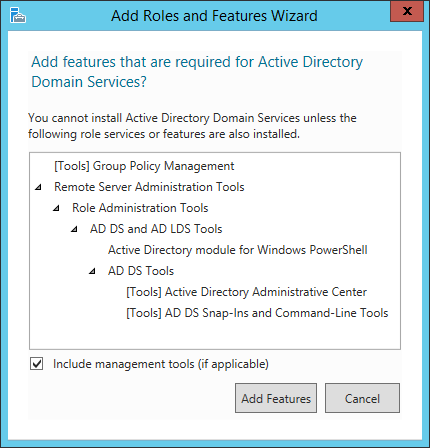
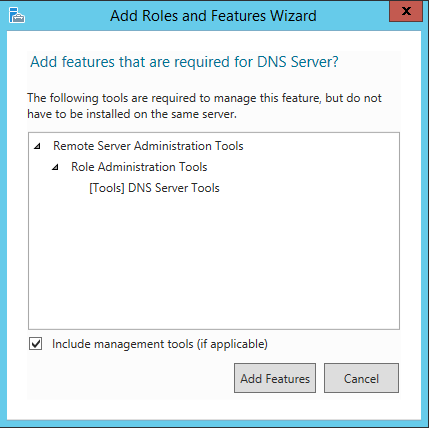
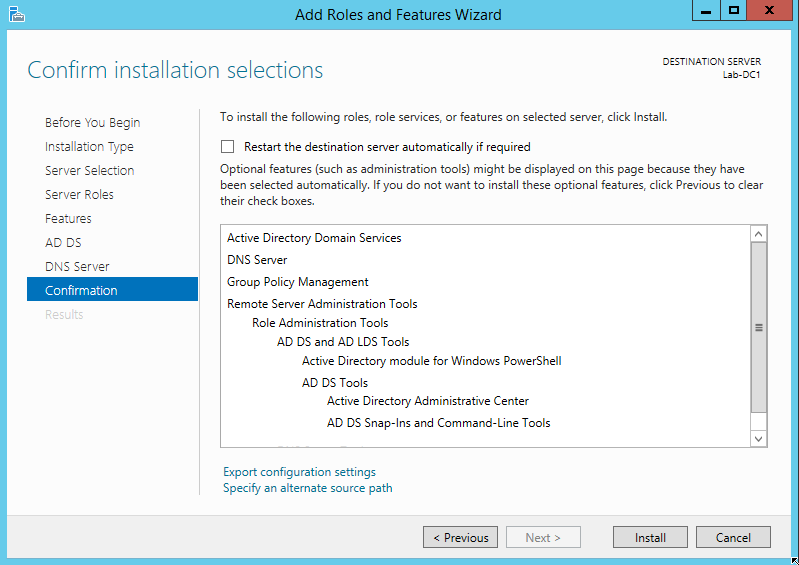
For our test environment, we want to add two roles: Active Directory Domain Services and DNS Server. Check both boxes. After each role’s box is checked, it will prompt you to add the required features and management tools. Accept the defaults, then click Next.
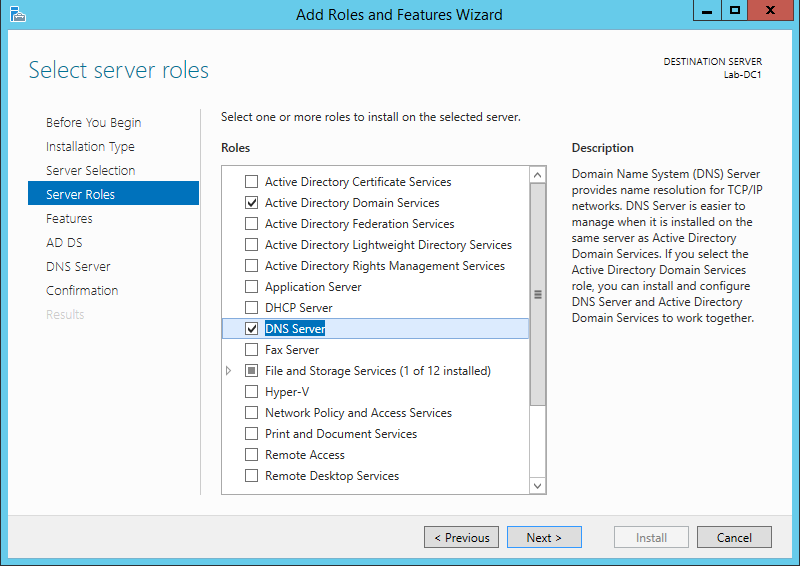
Click Next to bypass the next few screens – the roles will install all of the features we need for this project, and the following two screens are explanatory text about the roles. When you reach the Confirm Installation Selections screen, click Install.
After the installation completes, the feature is installed but not configured. You’ll notice a yellow exclamation point in the Server Manager toolbar. Drop down that menu to display the warning:
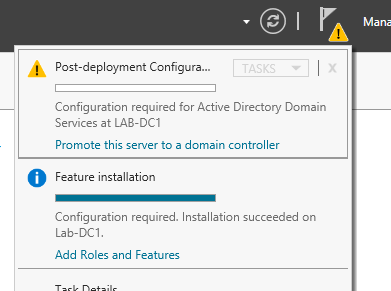
Click the blue link Promote this server to a domain controller to start another wizard.
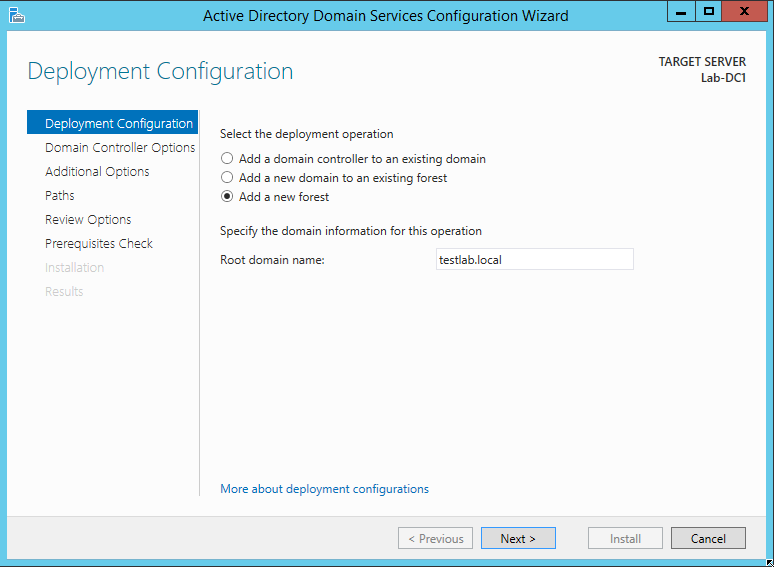
On the Deployment Configuration screen, select Add a new forest. (A forest is a group of one or more related domains.) Give your new domain a name. This name must follow certain rules, one of which is that it must include at least two parts. I’ll call my forest testlab.local.
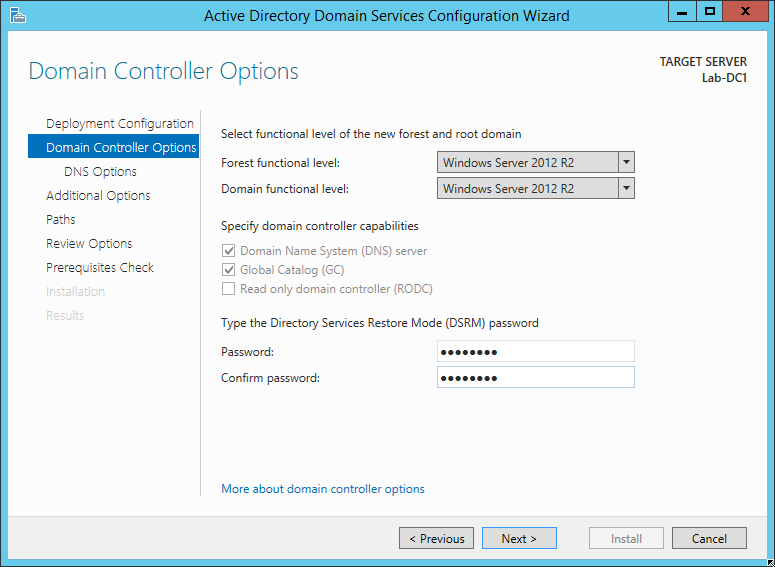
In the Domain Controller Options screen, accept the defaults and assign a DSRM password. Click Next.
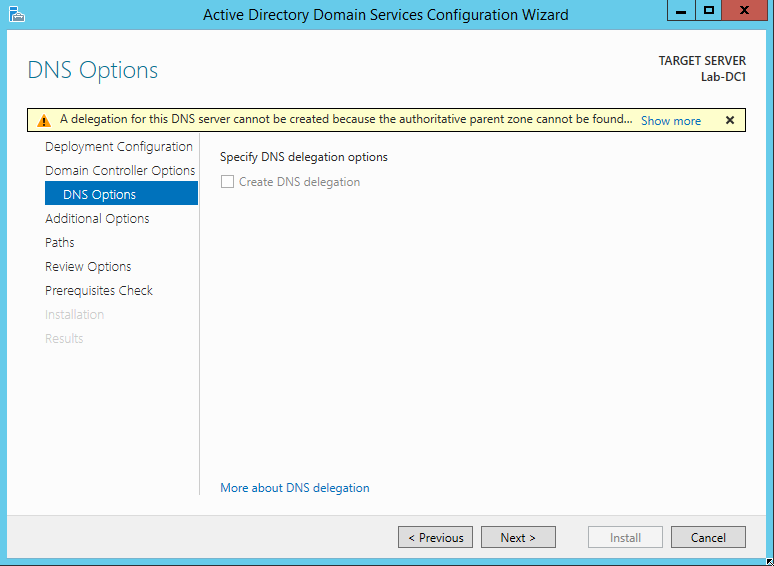
The DNS options screen will display a warning at the top. Since you’re not integrating with an existing network, you can ignore it. Click Next.
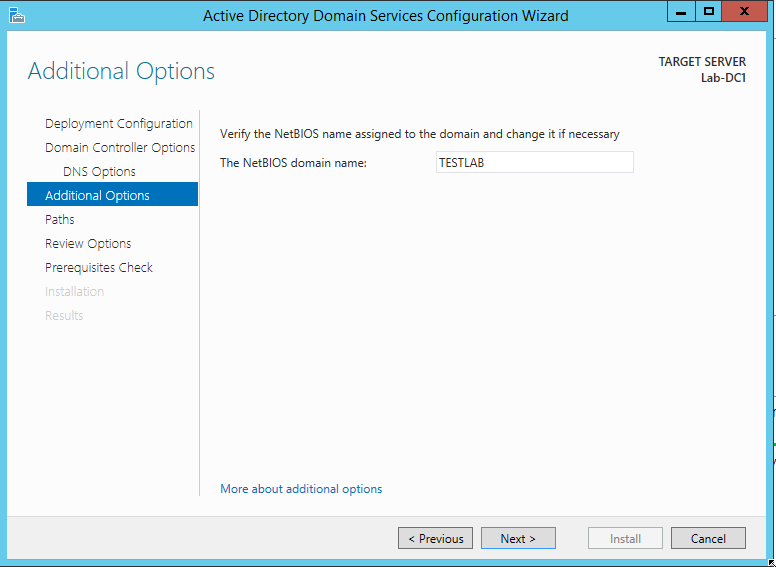
The next screen will simply ask you to verify your NetBIOS name – the first part of the domain name you specified earlier. Click Next.
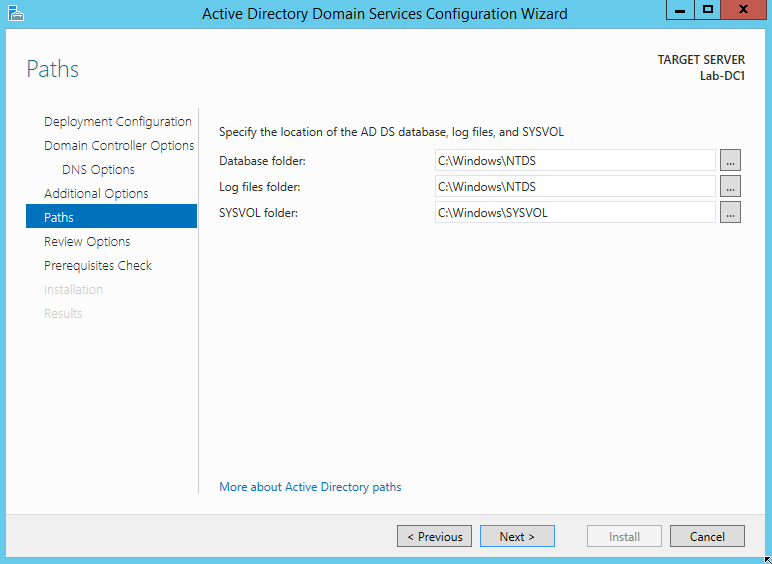
The last options screen will allow you to change the paths where your AD files are stored. Click Next to accept the defaults.
Finally, the wizard will ask you to review the configuration options. Click Next, and it will verify the prerequisites. You may receive warnings, but they’re OK for our purposes. Click Install to begin the installation. When the installation is finished, the server will reboot and your domain will be online.
What’s Next?
Now that we have a network and a domain, the next step is to build the database servers. We’ll cover that in Part III. Stay tuned!
This is my post for Week 4 of the SQL New Blogger Challenge. Check out all of this week’s posts on Twitter (#SQLNewBlogger).
One thought on “Creating a Self-Contained Multi-Subnet Test Environment, Part II – Adding a Domain Controller”
Comments are closed.